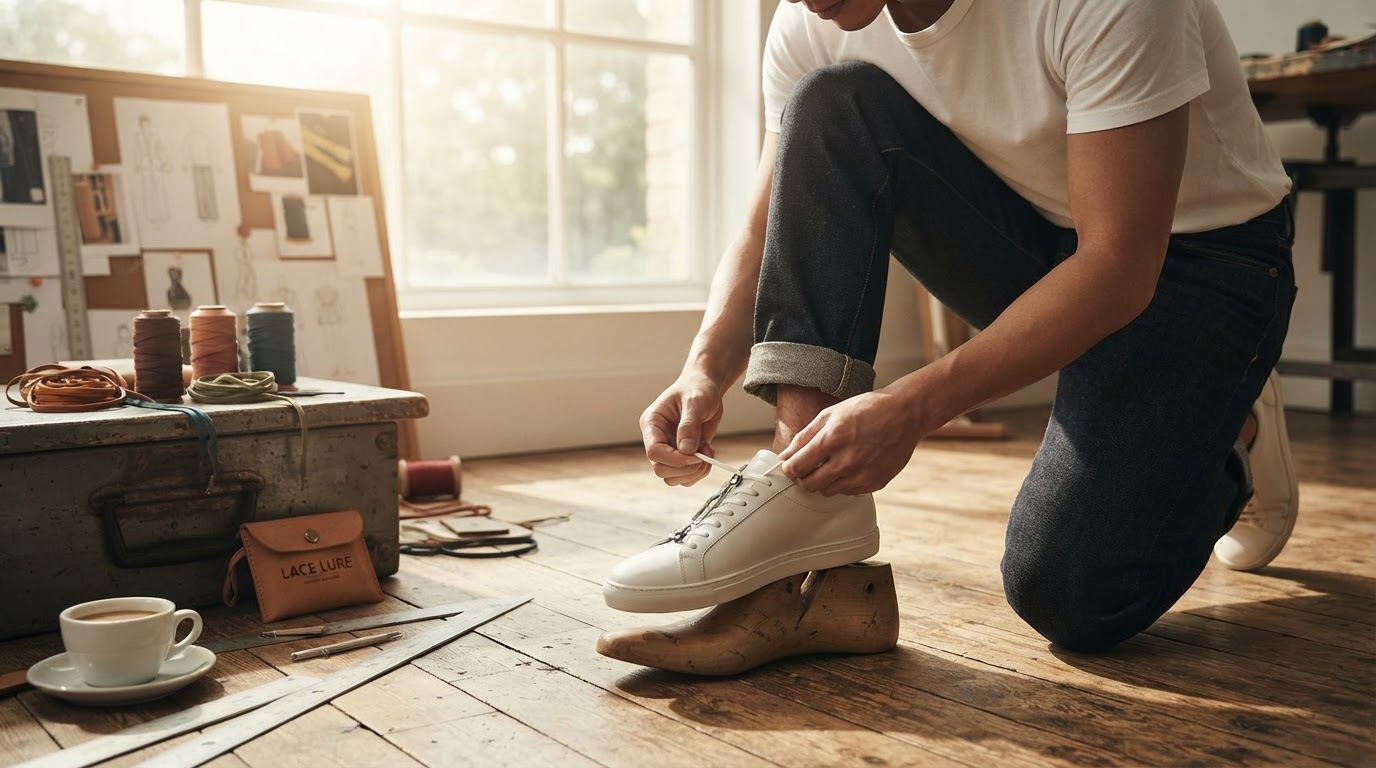
I moved my lace lures 28 mm and my shoes stopped misbehaving
 Jordan HaleStaff Writer
I got the cleanest look from my Lace Lure Set when each piece sat 28–35 mm above the toe break, not at the bottom eyelet where I first wanted to put it. That small shift cut my lace twist from roughly 90 degrees per walk to under 20 degrees on my most flexible pair of sneakers, and it made the set feel like part of the shoe instead of something riding on top of it.
I’m starting there because most shoe-accessory advice stops at “put it where it looks good.” I’ve worn lace charms, metal tags, and decorative lace pieces on canvas sneakers, trainers, and leather casual shoes, and the non-obvious lesson is this: the prettiest position in a product photo is not always the position that survives stairs, flexing, and a full day of walking.
The Lace Lure Set is a style accessory, but it still lives inside a functional system: laces, eyelets, tongue, vamp, knot, ankle movement, and the way your shoe bends. If you place it with those mechanics in mind, it looks more deliberate and stays more comfortable.
Why placement matters more than the lure itself
A lace lure is small, so it’s easy to underestimate. But on a shoe, small changes can matter. Running-shoe researchers have shown that lacing configuration affects pressure distribution and shoe stability. One study by Hagen and Hennig in the Journal of Sports Sciences found that different lacing patterns changed plantar pressure and perceived comfort during running. That doesn’t mean a decorative lace lure turns your sneaker into a lab instrument, but it does mean lace layout is not just visual.
The lure also sits near a high-motion area. The lower part of a shoe bends at the toe break. The upper part moves with ankle flexion. The middle section, just below the knot but above the forefoot crease, is usually the calmest zone. That’s where I now start.
I also think about trip and snag risk. The National Institute for Occupational Safety and Health has long treated slips, trips, and falls as a serious safety category, especially when loose objects or uneven surfaces are involved. A lace lure should never create a loop, dangle, or hard edge that can catch on a stair tread, bike pedal, car mat, escalator side, or gym machine.
My small field test: five positions, six pairs of shoes
Photo by https://kaboompics.com/ on Pexels
This was not a university lab test. It was a practical field check I ran because I kept seeing the same problem: the lure looked centered when I installed it, then drifted or angled after walking.
I tested six everyday shoes: two canvas low-tops, one leather low-top, one knit trainer, one thicker skate-style shoe, and one casual boot. I walked the same neighborhood loop, about 1.2 miles, and checked each placement after the walk. I used a ruler, phone timer, and the same flat polyester laces where possible.
Observed results
| Lace lure position | Distance from toe break | Avg. install time | Visible twist after 1.2 mi | Comfort note | My verdict | |---|---:|---:|---:|---|---| | Bottom eyelet row | 0–12 mm | 42 sec | 80–110° | Pulled with forefoot flex | Looks good in photos, worst in motion | | One row above toe break | 18–25 mm | 49 sec | 35–60° | Acceptable on stiff shoes | Works only on structured uppers | | Mid-vamp sweet spot | 28–35 mm | 51 sec | 10–20° | No pressure noticed | Most reliable placement | | Just below knot | 55–70 mm | 45 sec | 15–35° | Sometimes touched bow loops | Good if your laces are short | | Off-center diagonal | varied | 64 sec | 20–50° | Looked intentional, less stable | Fun styling, needs careful tension |
The surprise was that the highest placement did not always stay flatter. If the lure sat too close to the bow, the knot and loops hit it during walking. The bottom placement looked symmetrical while I was holding the shoe, but the toe flex kept levering it upward.
The mid-vamp spot was the boring winner. On most shoes, that meant installing the Lace Lure Set between the second and third eyelet rows from the bottom, or between the third and fourth on shoes with a long toe box.
Counter to what you'll read elsewhere: don’t center it by counting eyelets
Counter to what you’ll read elsewhere: I don’t use eyelet count as my main placement guide anymore. I use the toe break.
Counting eyelets sounds neat: “Put it on the third row.” But shoe patterns vary wildly. A five-eyelet canvas sneaker, a seven-eyelet trainer, and a boot with speed hooks can all put the third row in different functional places. The lace lure doesn’t care about the row number. It reacts to flex, lace angle, and tension.
My rule is simpler: put the shoe on, bend your toes like you’re stepping forward, and mark the crease line. Then place the lure at least one lace crossing above that crease, but not so high that it fights the knot.
That one habit made my setups look less accidental.
A quick note on materials, edges, and standards
Decorative shoe hardware should be smooth enough that it doesn’t abrade the lace. The same idea appears throughout product safety and materials standards: edges, contact surfaces, and durability matter because repeated movement turns small rough spots into failure points.
For footwear testing, ASTM F2913 is widely used for measuring slip resistance of whole shoes, and ISO 20344 describes test methods for footwear. Those standards are not lace-lure-specific, and I’m not pretending a lace accessory is certified under them. I bring them up because they remind me to treat shoes as moving equipment, not static display objects.
On my own pairs, I check three things:
- Edge feel: I run the lure across a spare lace under light tension. If it feels grabby, I reposition or don’t use that lace.
- Lace width: Flat laces need enough surface area to keep the lure from rolling. Round laces can look clean but tend to let accessories rotate.
- Tongue pressure: If I can feel the lure through the tongue while walking indoors for five minutes, I move it lower or higher.
My decision framework for Lace Lure Set placement
Here’s the framework I use now when I set up a new pair.
1. Identify the shoe type first
Canvas low-tops: These flex a lot. Avoid the bottom row. Use the mid-vamp zone and keep the laces flat.
Leather sneakers: More structure gives you more freedom. The lure can sit slightly lower if the vamp doesn’t fold sharply.
Knit trainers: Be careful. Knit uppers shift more and may make any accessory rotate. I use lighter tension and avoid aggressive diagonal placement.
Skate shoes: Thick tongues hide pressure well, but the lace path is often wide. Make sure the lure doesn’t float between loose lace spans.
Boots: Great for a centered tag look, but don’t put decorative pieces near speed hooks or areas where the laces need to cinch hard.
2. Find the toe break while the shoe is on your foot
Don’t guess with the shoe empty. Put it on, stand up, and bend forward slightly. The crease that forms across the vamp is the line you want to avoid. A lure sitting directly on that line will be moved thousands of times in normal wear.
The American Podiatric Medical Association has repeatedly emphasized proper shoe fit and adequate toe room in its consumer guidance. I take that seriously with accessories too: if the setup changes how the shoe flexes or compresses the top of my foot, I move it.
3. Use lace tension to lock the look, not brute force
The most common mistake I see is yanking the laces tight after adding a charm or lure. That can pinch the tongue, create uneven lace angles, and make the lure tilt.
Instead, I tension from the toe upward:
If it rotates after five minutes, it will rotate after five hours.
4. Match the lure to the lace, not just the shoe color
This is where I changed my mind after testing. I used to prioritize contrast: silver on black, black on white, bright on neutral. Now I start with lace structure.
A crisp flat lace holds the lure better than a soft tubular lace. A waxed lace can look premium, but if it’s too slick, the lure may slide toward the center of the crossing. A frayed cotton lace makes everything look less intentional.
My favorite pairing is a flat lace with enough stiffness to stay broad under tension. It turns the lure into a clean visual line instead of a dangling object.
Practical installation checklist
Before I walk out the door with a fresh Lace Lure Set installation, I run this checklist:
- Put the shoe on before final placement.
- Locate the toe break and keep the lure above it.
- Keep at least one lace crossing between the lure and the knot.
- Use flat laces if you want the most stable look.
- Check that the lure does not touch the ground-facing side of the shoe when flexed.
- Walk indoors for five minutes before wearing outside.
- Climb one flight of stairs if you can; stairs reveal loose loops fast.
- Re-tie after the first 20–30 minutes of wear, especially on new laces.
- Remove the lure before machine washing shoes unless the product care instructions clearly say otherwise.
- Do not use on shoes where the accessory interferes with fastening, medical orthotics, braces, or workplace safety requirements.
What I’d do for different looks
Photo by cottonbro studio on Pexels
Clean centered look
Place one lure in the mid-vamp sweet spot, aligned horizontally across both lace runs. Keep the bow small. This is the setup I’d use for white sneakers, simple trainers, and everyday outfits.
Stacked look
Use two pieces, but separate them by at least one lace crossing. If they touch, they tend to sound and move like hardware rather than design.
Asymmetric look
Offset one lure slightly to the outside of each shoe. This looks more intentional than a nearly-centered piece that accidentally drifted. I use this on chunkier shoes, not minimal canvas sneakers.
Low-profile look
Use matching laces and a lure color close to the eyelets. From a distance, it reads like a custom shoe detail instead of an added accessory.
Cleaning and wear notes from my own pairs
I don’t over-clean lace accessories. Most grime is lace grime, not lure grime. I remove the set, wipe it with a slightly damp microfiber cloth, dry it fully, and then inspect the lace path before reinstalling.
If the laces have gray pressure marks where the lure sat, that’s normal after wear. If I see fuzzing, cuts, or shiny abrasion lines, I replace the laces or move the lure. Laces are cheap; a clean setup depends on them more than people think.
I also store the set in a small pouch rather than loose in a drawer. Tiny accessories pick up scratches quickly when they rub against keys, coins, or other hardware.
The fit-first rule I keep coming back to
I like shoe details that make a pair feel more personal. That’s the appeal of the Lace Lure Set for me: it changes the read of a shoe without requiring a permanent modification.
But the accessory has to respect the shoe. If the lure changes how I tie the shoe, makes me loosen the fit too much, catches on the bow, or sits on the toe crease, I move it. The winning placement is not the one that looks perfect in your hand. It’s the one that still looks good after walking, bending, climbing stairs, and retying once.
For most people, I’d start 28–35 mm above the toe break, use flat laces, and test indoors before committing. That small bit of patience is the difference between “nice detail” and “why is this thing crooked?”
FAQ
Can I use a Lace Lure Set on running shoes?
You can, but I’d be selective. For actual running, I avoid anything that changes lace tension, adds pressure over the top of the foot, or creates a snag point. Lacing research shows that lace configuration can affect comfort and pressure, so performance shoes deserve extra caution. For casual wear of running-style sneakers, use the mid-vamp placement and test for rotation.
Will lace lures damage my shoelaces?
They should not if the edges are smooth, the lace is wide enough, and the lure is not forced into a high-friction spot. I still check after the first day. If I see fuzzing or flat shiny wear marks, I switch to sturdier flat laces or move the lure away from the flex zone.
Where should I put them if my shoes only have five eyelet rows?
Don’t count rows first. Put the shoe on, find the toe crease, and place the lure one crossing above that crease while leaving space below the knot. On many five-eyelet shoes, that ends up around the second or third crossing, but the crease test is more reliable.
Should both shoes be perfectly symmetrical?
Visually, yes, but physically they may need tiny adjustments. Feet are often slightly different, and laces settle differently on each shoe. I measure from the toe break, not the toe cap, and I’m fine with a few millimeters of difference if both lures sit flat when worn.
Sources
- Hagen & Hennig, “Effects of different shoe-lacing patterns on the biomechanics of running shoes,” Journal of Sports Sciences / PubMed
- NIOSH: Slip, Trip, and Fall Prevention for Healthcare Workers
- ASTM F2913 footwear slip resistance test method
- ISO 20344 footwear test methods overview